Globus Connect Server version 4 Final Configuration
It is now time to finish the endpoint’s configuration!
To finish your endpoint’s configuration, you will need to do some work on the server, followed by some work on the Globus web site.
Additional GridFTP Configuration
When you ran globus-connect-server-setup, most of GridFTP’s configuration was
done for you automatically. But, some additional configuration is needed to
meet MinSec requirements for Moderate Risk data.
The following five commands, run as root, will take care of the configuration
for you:
echo 'log_transfer /var/log/gridftp_transfer.log' > /var/lib/globus-connect-server/gridftp.d/transfer-logging
ln -s /var/lib/globus-connect-server/gridftp.d/transfer-logging /etc/gridftp.d/transfer-logging
sed -e 's|/var/log/gridftp.log|/var/log/gridftp.log /var/log/gridftp_transfer.log|' -e 's|postrotate|sharedscripts\n   postrotate|' -i /etc/logrotate.d/globus-connect-server
sed -e 's|MIN_TLS_PROTOCOL=.*|MIN_TLS_PROTOCOL=TLS1_1_VERSION|' -i /etc/grid-security/gsi.conf
/etc/init.d/globus-gridftp-server restart
The above commands make two major changes:
-
Transfer logging is enabled. This logs every file transfer to
/var/log/gridftp_transfer.log.Each file-transfer log entry includes the unique ID of the Task the user submitted, the file being transferred, and the IP address of the other end of the transfer.
This is implemented by creating a file in
/var/lib/globus-connect-server/gridftp.d/transfer-logging, with a symlink from/etc/gridftp.d/transfer-logging. The file contains the linelog_transfer /var/log/gridftp_transfer.log.The existing log-rotation configuration is also updated to account for this new log file.
-
TLS 1.1 is set as the minimum TLS version for all GridFTP and MyProxy communications. This includes all communications between Globus and MyProxy (when legacy MyProxy authentication is in use), all communications between the MyProxy OAuth server and MyProxy (when MyProxy OAuth authentication is in use), all communications between Globus and the GridFTP service (for metadata activity and transfer coordination), and—when transfer encryption is enabled—all data traffic between endpoints.
The normal default is to use TLS 1.0 and later. Regardless of this setting, normal TLS negotiation processes are used, so if both ends support a more modern TLS version, that will end up being used.
This is implemented by editing
/etc/grid-security/gsi.conf, settingMIN_TLS_PROTOCOLtoTLS1_1_VERSION.
Accessing the Endpoint
Now that Globus Connect Server is running, and GridFTP’s configuration has been updated, some final endpoint configuraion must be performed on the Globus web site.
Log in, and go to the Endpoints page.
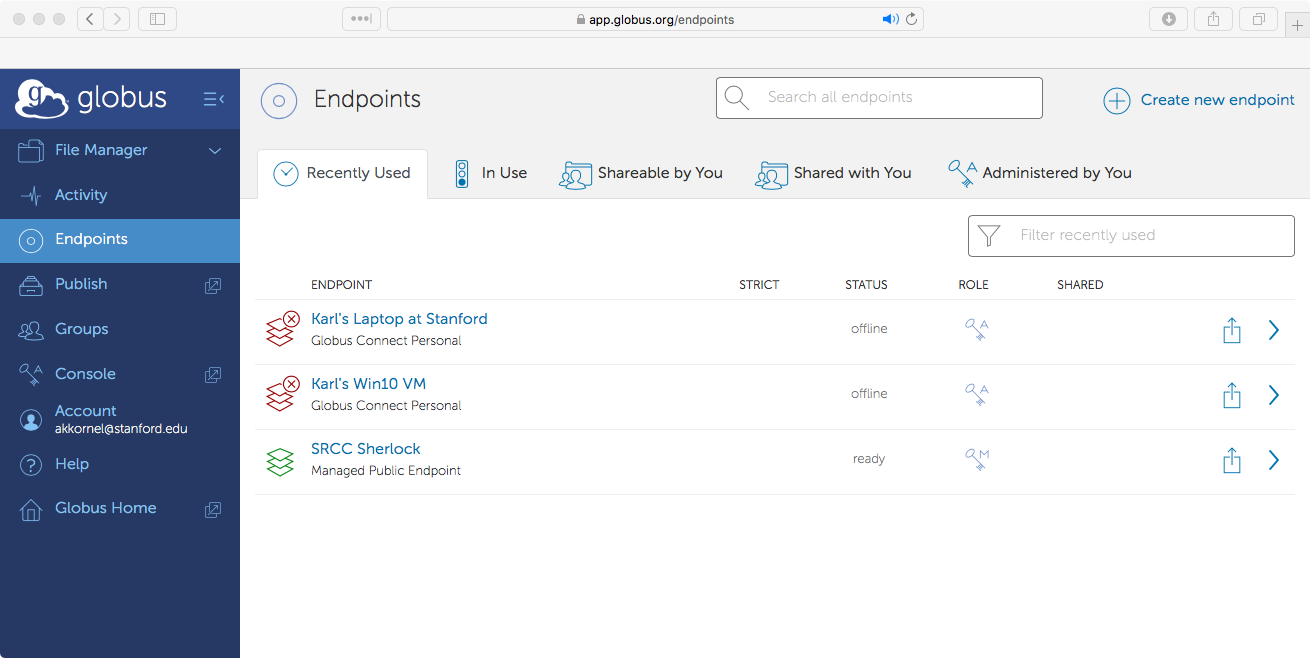
Recently-Used Endpoints
When you reach the Endpoints page, at the top of the list of endpoints, click on Administered By You. The list of endpoints will switch to show endpoints administered by your Globus ID.
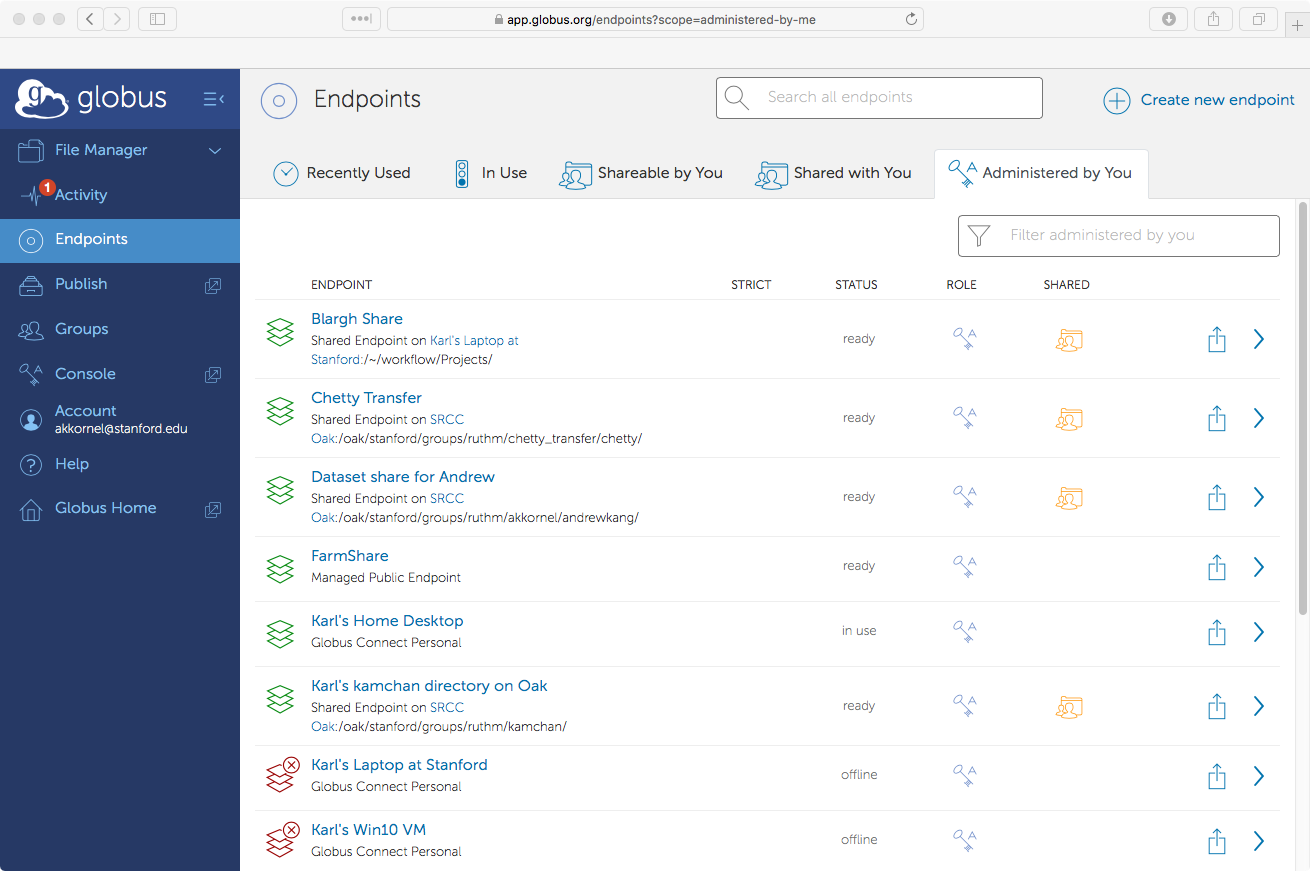
Endpoints You Administer
Your newly-created endpoint will appear. Click on the endpoint’s name, and you will be taken to the Endpoint Overview page.
Endpoint Overview
Click on the Edit Attributes button, so that you can fill in the missing endpoint information.
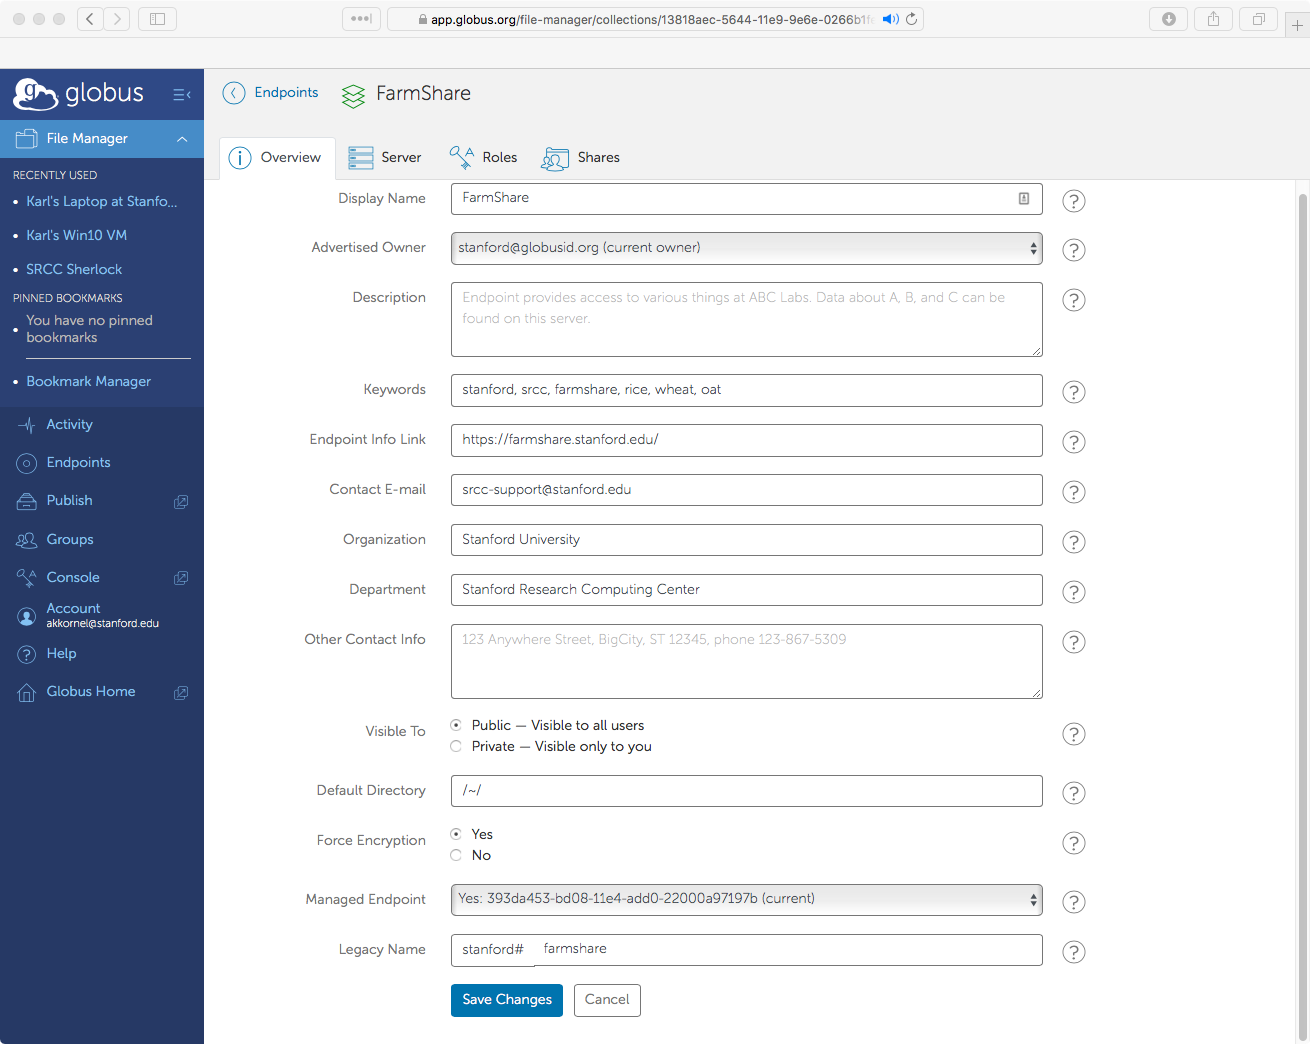
Endpoint Information
All of the fields should be filled in. Here are some guidelines:
-
The display name should contain a clear indication of the endpoint’s purpose. In the example above, this is a file server, and so the display name includes the lab name and file server name.
-
The description should contain a more-detailed description of the endpoint’s purpose.
-
The keywords should contain at least two items:
stanford, and your lab’s name. -
The endpoint info link should contain one of the following (ranked from most preferred to least preferred):
-
A link to a web page containing information on the specific endpoint, or the data provided by the endpoint.
-
A link to your group’s web page.
-
A link to your department or school’s web page.
-
-
The contact email is a mailing list for your lab, or the email address of someone responsible for the endpoint. A helpdesk or ticketing system email address is also appropriate.
-
The organization must be
Stanford University, assuming you are using Stanford’s campus subscription. -
The department must be your lab’s or group’s name.
-
The other contact info should be your lab’s or group’s mailing address.
-
Force encryption must be set to
Yesif either of these two conditions are true:-
When you did your initial configuration, you had set
RequireEncryptiontoTrue. -
Your endpoint has access to Moderate Risk data.
If none of the above conditions are met, then you can set this to
Yesif you wish. -
-
Managed endpoint must be set to
Yes. This ensures subscription-only features are available (even if you decide not to use them).
Once you have filled in your endpoint’s information, save changes and go to the Server tab.
Server
The Server tab contains information on how users are authenticated, server location & performance, and server connection details.

Endpoint Server Information
Authenticaion, locaion, performance, and connection details.
The first section, Identity Provider, tells Globus how users authenticate. You should make sure the values are correct:
-
If you are using CILogon authentication, the type should be
MyProxy OAuthand the host should becilogon.org. -
If you are using MyProxy OAuth authentication, the type should be
MyProxy OAuthand the host should be the fully-qualified domain name of your endpoint. -
If you are using legacy MyProxy authentication, the type should be
MyProxy, the host should be the fully-qualified domain name of your endpoint, and the dn should be something that starts with/C=US/O=Globus Consortium/.
From time to time, globus-connect-server-setup fails to set the legacy
MyProxy DN correctly. If the host is correct but the dn is empty, you can
set it yourself. Use the following command to obtain the correct string to
set:
[root@scigc-xfs-2 ~]# openssl x509 -noout -subject -in /var/lib/globus-connect-server/grid-security/hostcert.pem
subject= /C=US/O=Globus Consortium/OU=Globus Connect Service/CN=8075a01e-236b-11e8-b773-0ac6873fc732
Next, skip to the third section, Server. There should be one server entry.
The URI of the server should use the scheme gsiftp, the port number 2811,
and your server’s fully-qualified domain name. The subject dn should also be
set. If it is missing, you can use the openssl x509 command from above to
obtain the correct value.
To finish this tab, go up to the second section, contains the Network Use
settings. Click on the section’s edit link, and change the location to
37.43,-122.17. Globus uses the general location of each endpoint influences
amount of parallelism: As endpoints grow farther apart, transfers between
endpoints are split into more pieces, to be transferred simultaneously.
Before saving changes, you should also set the appropriate value in the Network Use dropdown. Here is a basic guide to follow:
-
If your endpoint system is only used for data transfers, and has at least 1 Gigabit of bandwidth to the core network, set this to
aggressive. -
If your endpoint system is also used by end users, or you aren’t sure about bandwidth from your endpoint to the core, set this to
normal. -
If your endpoint system is also used by end users, and they are complaining about slow access to disk, change this to
minimal.
Save changes, and go to the Roles tab.
Roles
The Roles tab shows all of the accounts which have special access to your endpoint.
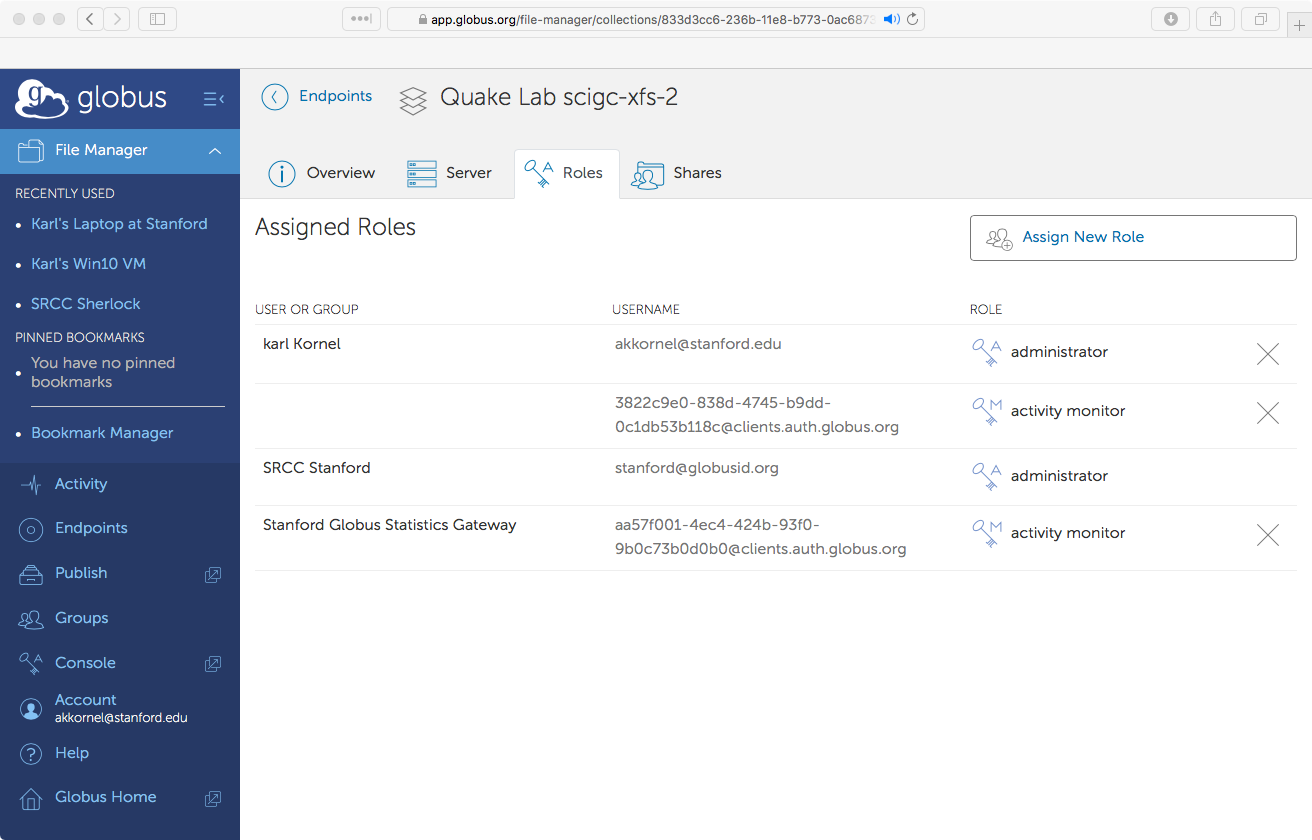
Endpoint Roles
Authenticaion, locaion, performance, and connection details.
When your endpoint was first created, your Globus ID was added as an administrator. You should now give elevated access to at least two more accounts:
-
Add yourself as an Administrator. You should be able to find yourself by entering your
sunetid@stanford.edu. -
Add team members as Administrators.
-
Add the address
aa57f001-4ec4-424b-93f0-9b0c73b0d0b0@clients.auth.globus.orgas an “Activity Monitor”. This account is used by a program—run by SRCC—which collects usage information. Giving access for usage data collection is a condition of getting access to the campus Globus subscription.
Role changes take effect immediately, so there is no need to explicitly save your changes here.
Test!
At this point, Globus Connect Server configuration has been completed. You should now launch a second browser, log in to the Globus web site as yourself, and perform some tests:
-
You should be able to access the endpoint, and your default directory should return a directory listing.
-
Test that access permissions hold:
-
If you have set the
RestrictPathssetting on the endpoint, make sure you can list the contents of all of the allowed directories. Also, make sure that disallowed directories can not be listed. -
If you left
RestrictPathsempty, make sure you can list the contents of directories that you can normally access, like your home directory, and/tmp. Also try to list a restricted directory (like/root), and make sure it fails.
-
-
Perform some data transfers from your endpoint:
-
If you have set the
RestrictPathssetting on the endpoint, you should test all of the paths that are allowed. -
If you left
RestrictPathsempty, perform test transfers from some directories that you have access to.
When performing these transfer tests, you can send data to a Globus Connect Personal endpoint on your local system, or to another endpoint where you have write access.
-
-
Perform some data transfers to your endpoint.
This step only applies if permissions (OS permissions, and the
RestrictPathssetting) allow writing to the endpoint.-
If you have set the
RestrictPathssetting on the endpoint, you should test all of the paths that are allowed. -
If you left
RestrictPathsempty, perform test transfers from some directories that you have access to.
When performing these transfer tests, you should use the
esnet#sunn-dtnendpoint as the source of the transfer. This endpoint is run by ESnet and is hosted in Sunnyvale, close to one of Stanford’s network links to the outside world. It will happily saturate your endpoint’s network connection. -
-
If you have enabled sharing, make sure that you can create a shared endpoint.
-
If you set
SharingRestrictPaths, then make sure you can create a shared endpoint on each allowed path. Also, make sure sharing of a disallowed path is blocked. -
If you left
SharingRestrictPathsun-set, then simply try sharing a directory that you are otherwise allowed to access.
-
-
If you have enabled sharing, perform a few transfer tests both from and to your shared endpoint.
If you encounter issues which you cannot resolve yourself, then you should reach out to Support.
Monitor!
Globus logs to two or three different paths, depending on authentication
method. If you are using MyProxy or MyProxy OAuth authentications, MyProxy
logs its activity to syslog. If you are using MyProxy OAuth, OAuth activity is
logged in Apache logs. Finally, GridFTP warnings and errors are logged at
/var/log/gridftp.log, with file-transfer records being logged at
/var/log/gridftp_transfer.log. You should ensure that Globus logs are
handled the same as other system/application logs in your group.
You should also ensure Qualys is scanning your endpoint for vulnarabilities, and that you are regularly checking reports and acting on the results. If your server is maintained by someone else, you should contact them. If you are also the server admin, and you need more information on Qualys, reach out to your LNA or to your ISO Consultant.
Finally, every quarter, you should go to your list of endpoints you administer, and heck for any endpoints that you do not use anymore. Those endpoints should be removed.
Congratulations, you have reached the end of the Server setup pages! We, SRCC, the contributors to this site, and other Stanford Globus users hope that you will make good use of your new endpoint.