Unlinking and Demoting Identities
Beyond linking identities, you might also wish to unlink identities which you have linked. Or, you might be moving to a new institution, and wish to “demote” your current primary identity. Both procedures may be found on this page.
Unlinking Identities
Most of the time, you will not normally need to unlink an identity. You will only normally need to unlink an identity when you are demoting your primary identity. You can also unlink identities for institutions where you have not been affiliated for some time.
When you do find yourself needing to unlink an identity, follow this procedure.
To unlink an identity, log in to Globus and click on the Settings button (on the left-side column of buttons, near the bottom).
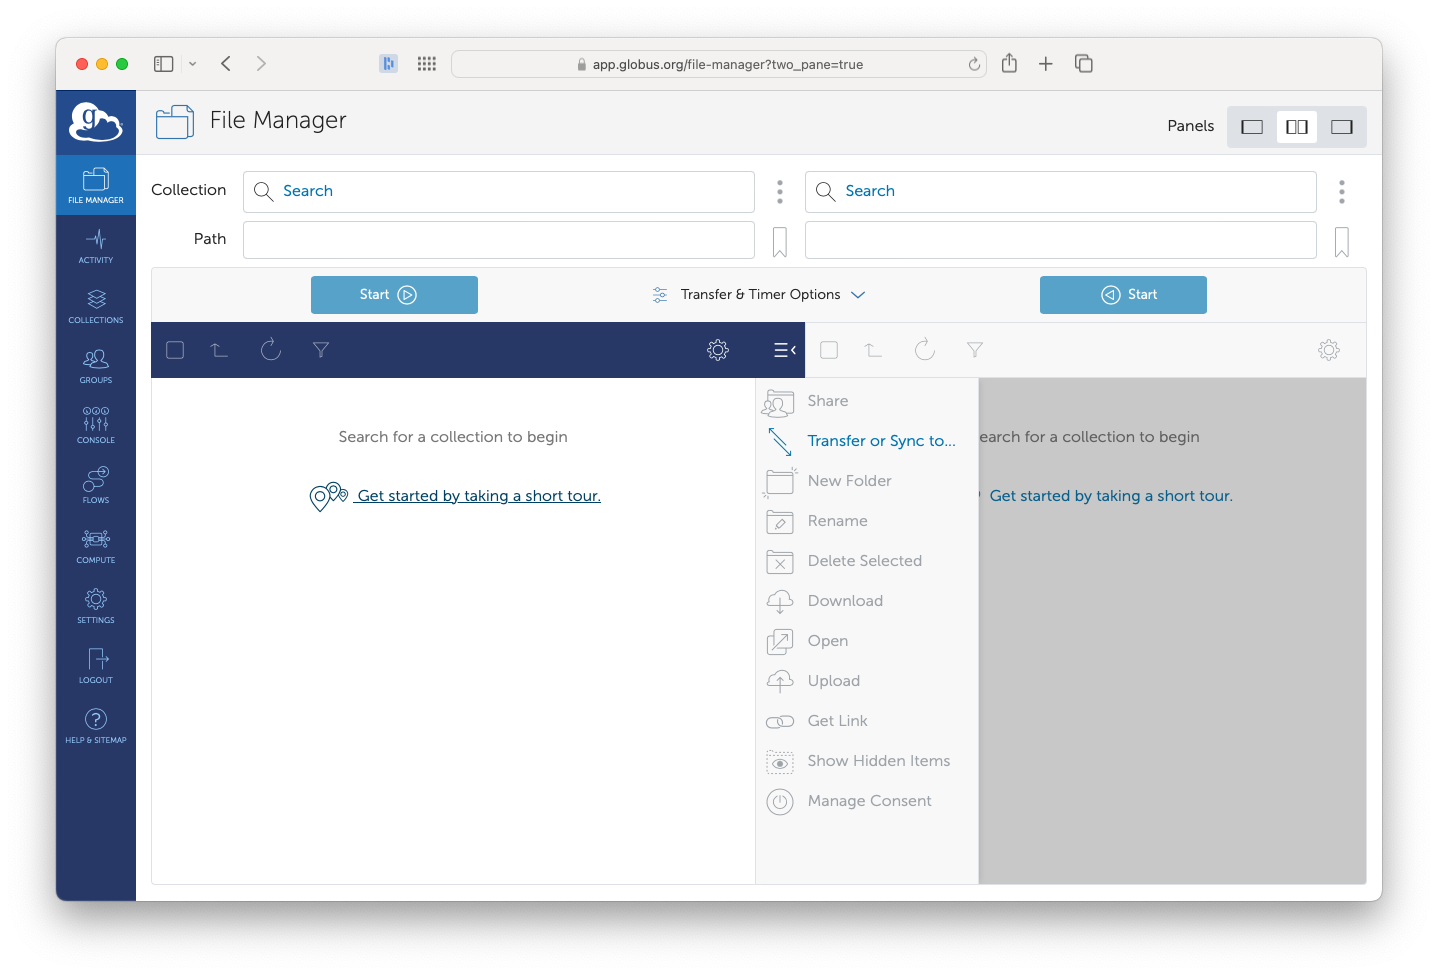
The Globus 'Transfer Files' screen
The 'Settings' button is near the bottom-left corner of the page.
On the Settings page will be a list of your identities, both primary and linked. Your primary identity will have a symbol next to it.
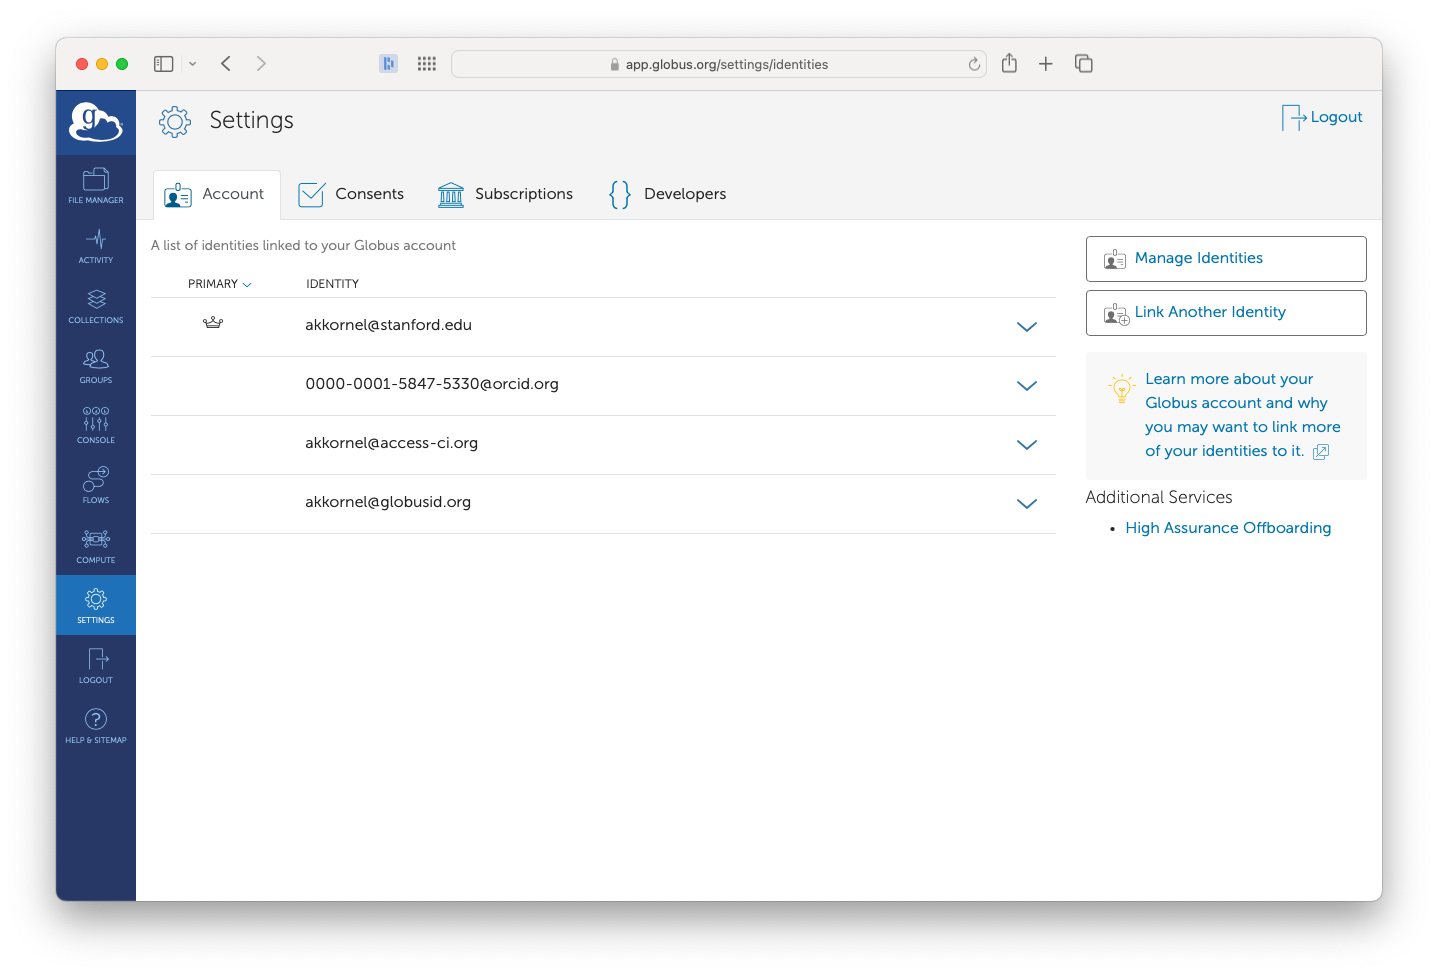
The Globus Settings page, showing the Account tab
This user has four identities. 'akkornel@stanford.edu' is the primary identity; the others are linked identities.
Although this page lists your identities, it does not allow you to manage them. To manage your identities, click on the Manage Identities button (on the top-right part of the page).
You will be taken to a page listing all of your identities. Each linked identity will have a to the right of the identity.
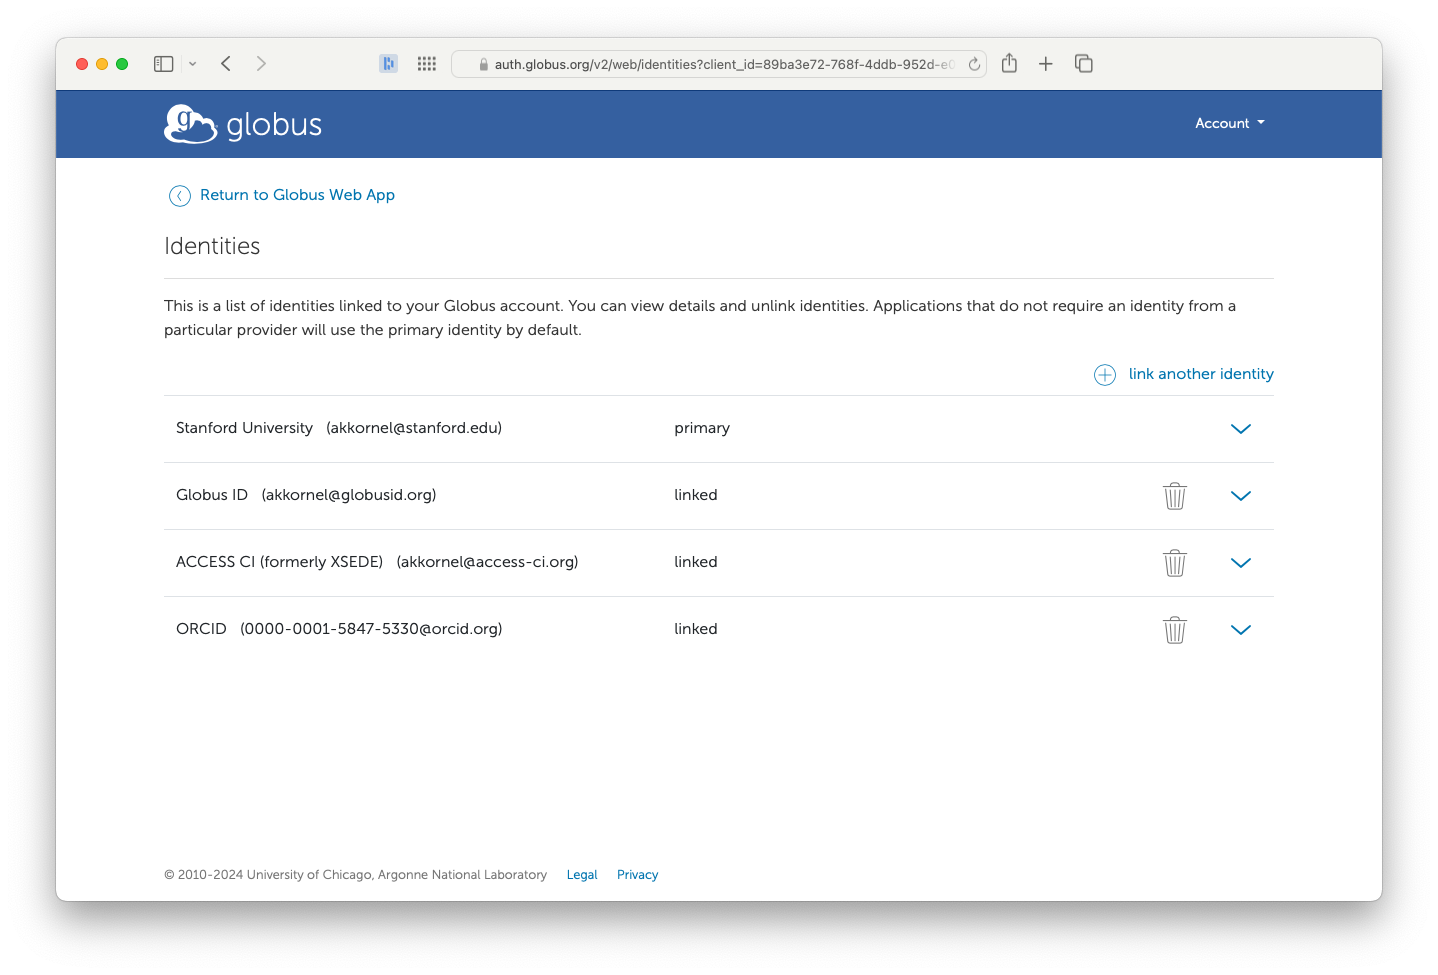
The Globus Manage Identities page
Click on the trash can to delete an identity.
Locate the identity you wish to remove, and click on the . You will then be asked if you are sure about unlinking the identity.

Your linked identity's point of no return
This is your last chance to go back!
If you confirm the operation, the identity will be unlinked.
Demoting Primary Identities
Although Globus recognizes that one human may have multiple identities, only one of those may be your primary identity. It is possible to change your primary identity, using the steps described in this section. You should do this whenever you change your primary institutional affiliation.
Step 1a: Check Your Admin Access
If you are an owner or administrator of any Globus Connect Server endpoints, or of any Mapped Collections, consider adding a coworker (or a Globus Group containing one or more coworkers) as an Administrator. This will ensure admin access can be maintained during the transition.
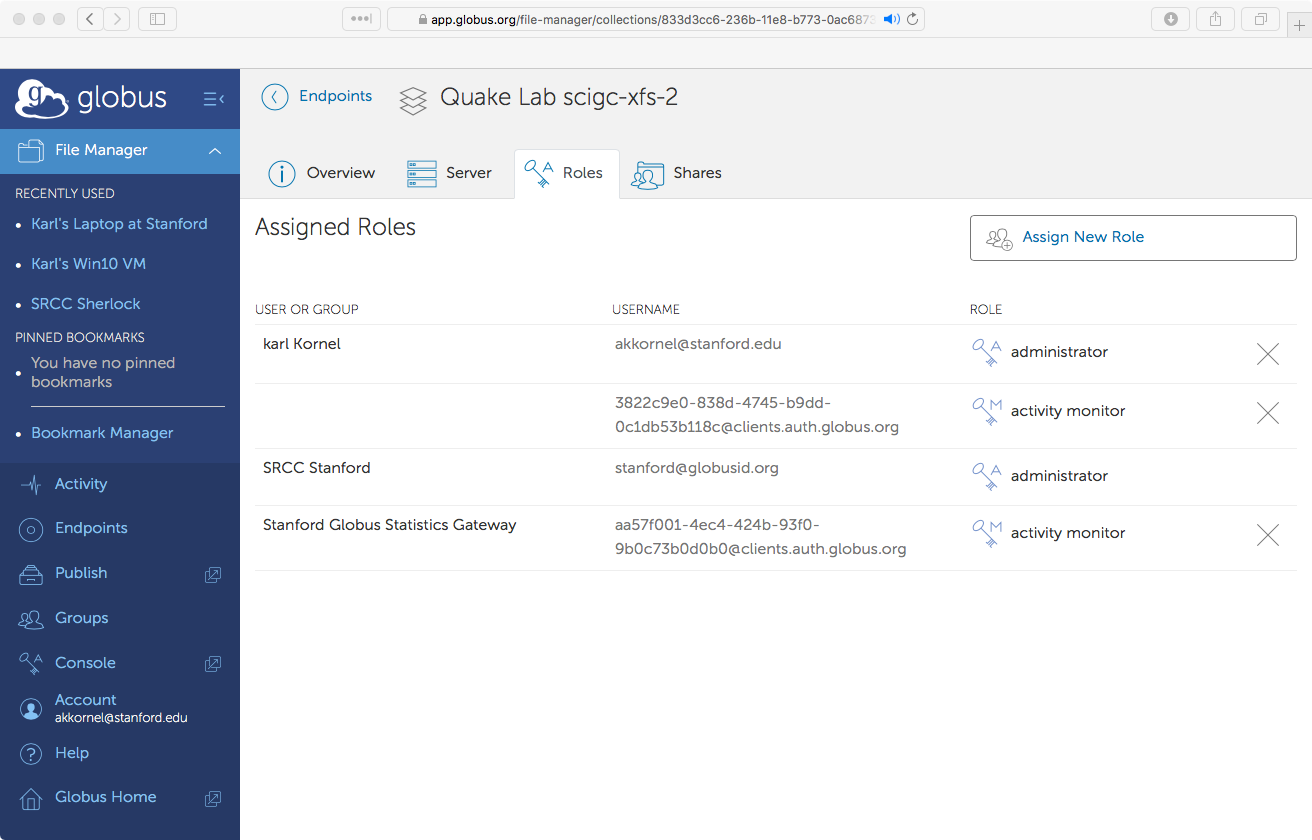
An example Globus Connect Server endpoint
This is where you should check administrators. This is a Globus Connect Server endpoint, with multiple administrators.
Step 1b: Check Your GCP
If you are running Globus Connect Personal (GCP), it will remain associated with whichever Globus Identity you selected when you installed it. It is not possible to change the ownership of a Globus Connect Personal installation, so if you want it associated with a new owner, you will have to do a fresh installation of GCP.
Step 2: Unlink All Linked Identities
Make a note of all of the your linked identities. Then, follow the instructions above to unlink your linked identities.
Step 3: Log In to Your New Primary Identity
Log out of Globus and log in using whichever identity you want to be your new primary identity. Globus will lead you through the normal account-creation process.
Step 4: Add Other Linked Identities
Use the identity-linking process to link all of your other identities to your new primary identity.
Step 5: Log in to Third-Party Sites
If you had any third-party sites or programs that used your Globus credentials, you will need to log back in to them, so that fetch new Globus credentials.
Congratulations, the identity-demotion process is complete!